Hey dolls, I know this is a bit late but I wanted to share my December Favorites with you!
I don't have many products but whatever I purchased in December I wanted to share with you guys, so if you guys love it you can buy it too.
I know I posted about the Sally glitter and Glue last time but I purchased another one this December.
.jpg) I purchased this headpiece from Charming Charlie, it is so gorgeous with gray crystals that sparkle!
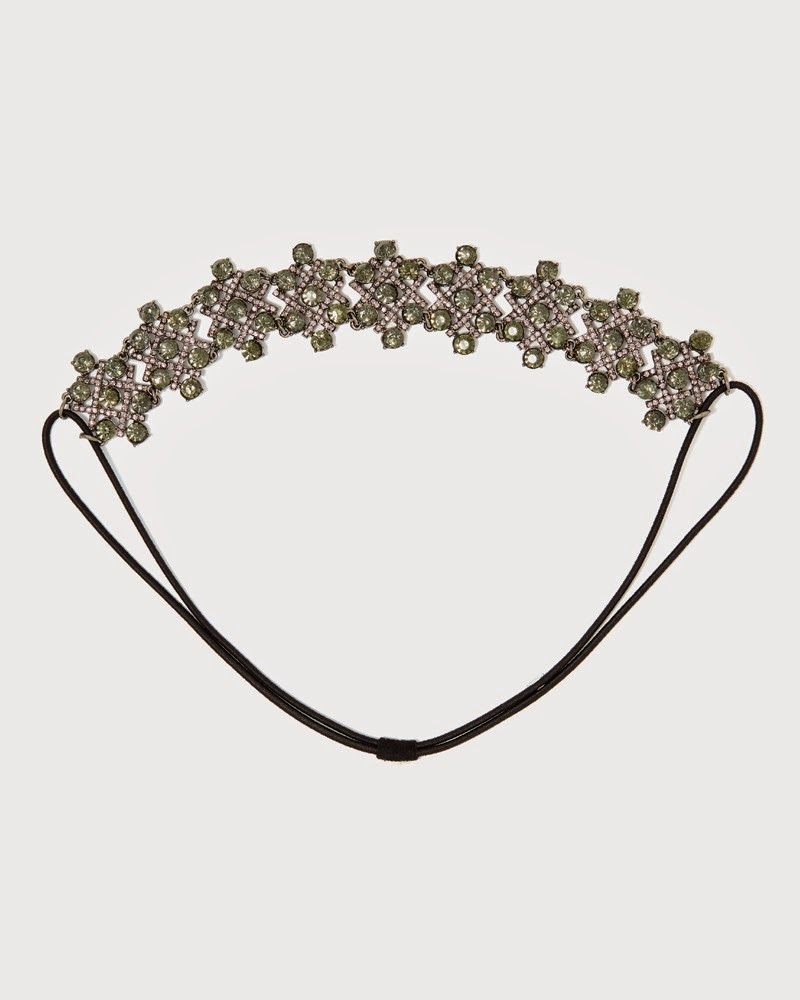
I purchased this headpiece from Charming Charlie, it is so gorgeous with gray crystals that sparkle!
You can either purchase it at the store or order it on their website. I love it so much, cannot wait to wear it at an event!
 I needed a setting powder that is not loose, because I already own a loose powder (it is running out) so I wanted to purchase a matte powder that will last me longer because loose powders don't last for me. I love the M.A.C mineralize natural setting powders. My shade is Medium Honey.
 I purchased the Smashbox Photo Op Palette because it caught my eyes when I was in Ulta. It is so pigmented and you can use it both wet and dry. I use it dry ususally but if you have M.A.C fix plus or any setting spray (I have MakeupForever setting spray) you can mix it on the brush and use it wet for a metallic finish!
The colors are beautiful. One thing I love about this pallete is that the colors range from gold, silver, purple, blue and brown with also some matte colors in it that will be perfect transition shades or even if you want a matte eye look, you can use those shades.

 Sally Beauty is my favorite store since their glitters are so inexpensive and worth it! The quality is amazing, they are not a rip off unlike some brands that sell glitter for $10 a pop! Glitter is very cheap to make and not expensive! If you are purchasing glitter that is $10 then thats fine too, maybe it will be ultra fine pigments, but if you want small specs of glitter then go to sally for a perfect deal. they are $1.00 and the adhesive is also $1.00! Can you believe that! I purchase all my glitters from Sally Beauty. Just be careful with them, apply the glitter slowly wipe off any access that will fall under your eyes. Make sure to apply the adhesive on your lids first and use a small brush to apply the glitter. Make sure not to put it inside your eyes (DUHH lol). The glitter sparkles and looks gorgeous in pictures!
 Lastly, I purchased a skincare item that works on my skin. I have some acne scars and these anti blemish pads from Noxema work well since my skin was break out recently. I have been using it since the beginning of December and I noticed that my marks are slowly vanishing. It does have strong scent and some acne medication inside so it will give you a tingle sensation on your face but it really works if you are dealing with blemishes and acne marks.
I don't have many products but whatever I purchased in December I wanted to share with you guys, so if you guys love it you can buy it too.
I know I posted about the Sally glitter and Glue last time but I purchased another one this December.
I purchased this headpiece from Charming Charlie, it is so gorgeous with gray crystals that sparkle!You can either purchase it at the store or order it on their website. I love it so much, cannot wait to wear it at an event!
The colors are beautiful. One thing I love about this pallete is that the colors range from gold, silver, purple, blue and brown with also some matte colors in it that will be perfect transition shades or even if you want a matte eye look, you can use those shades.
Sally Beauty is my favorite store since their glitters are so inexpensive and worth it! The quality is amazing, they are not a rip off unlike some brands that sell glitter for $10 a pop! Glitter is very cheap to make and not expensive! If you are purchasing glitter that is $10 then thats fine too, maybe it will be ultra fine pigments, but if you want small specs of glitter then go to sally for a perfect deal. they are $1.00 and the adhesive is also $1.00! Can you believe that! I purchase all my glitters from Sally Beauty. Just be careful with them, apply the glitter slowly wipe off any access that will fall under your eyes. Make sure to apply the adhesive on your lids first and use a small brush to apply the glitter. Make sure not to put it inside your eyes (DUHH lol). The glitter sparkles and looks gorgeous in pictures! Lastly, I purchased a skincare item that works on my skin. I have some acne scars and these anti blemish pads from Noxema work well since my skin was break out recently. I have been using it since the beginning of December and I noticed that my marks are slowly vanishing. It does have strong scent and some acne medication inside so it will give you a tingle sensation on your face but it really works if you are dealing with blemishes and acne marks.
You can purchase it at any drugstore!
Thanks for reading, stay tuned for more :)
Love, Naz


