This blog is all about how to create make up looks and new ideas and also product reviews!

Monday, May 25, 2015

Smokey dramatic eye look!


Hey dolls! 

I am in love with smokey eye makeup, it reminds me a lot of beautiful Arabic inspired makeup and I really like that. 
The way to re create this eye look in the picture is not hard at all! It's so easy as long as you use the right makeup products.

This is how I do my smokey eye. Keep reading :) 

Products you will need: eye shadow base, I have mine from NYX.
Matte brown eye shadow, matte black eye shadow, I love the Balm cosmetics matte eye shadows or you can use any matte shadows you have! 
Black liquid or gel eyeliner, Inglot gel liner is the long lasting and pigmented black ever!
Black or brown eye pencil for waterline.
Mascara, I have makeup Forever. 
Concealer, Mine is from Mac cosmetics
Inglot eye glitter to top it off (for the glam look). 

Directions: 
First, you will need to apply the base all over your eye lids so the shadow will stay. 
Then start with your crease buy taking Brown eyeshadow and buffing it in your crease, to create a transition shade. 
Next you take the black eyeshadow and apply it on the lids under your brown shadow where on your crease. 
Blend and apply more black shadow if needed. 
Using a black eyeliner, line your lash line, and smoke that line out with a pencil brush. 
Create a smokey effect by blending. 
Once you finish blending, add some sparkle by using Inglot eye glitter in black, on your lids to create a pretty glitter smokey eye.
Take the black gel liner or liquid eye liner, and line your lash line. 
Apply brown or black eye liner in your waterline, and also take a smudge brush or pencil brush and smoke it out under with black eyeshadow, very close to the lower lash line. 
Apply your mascara.
Once your done with the eyes, apply concealer on your under eye circles and use a fluffy concealer brush to blend it or a beauty blender. 
Take loose powder and gently pac some on top to set the concealer. 

You can also top the look with false lashes as well! 

Thank you for reading! Stay tuned for more better looks!!! I'm working on it! ❤️

Xoxo
Naz 
Instagram

Tuesday, May 19, 2015

Blue shadow makeup look


Hello everyone it's been a while since I haven't posted anything!!! I've been very sick for the past couple months and had to be in bed rest! Alhamdulillah I am feeling better now!

I had found a look I did and wanted to share it with you dolls!
This blue shimmer eyeshadow eye look is one of my favorite because the shadows I got are actually a pallete I received as a gift from Dubai and the colors are super pigmented in that palette.

You need a light blue shimmer eyeshadow , blue shadow and white shimmer eyeshadow
Also, NYX white jumbo pencil, black eyeliner and also liquid liner

Directions: first I applied nyx jumbo pencil in white all over my eyelids as a base. I sprayed my mufe setting spray on the shadow brush to make the colors pop.
I then took my shadow palette, and applied the blue shimmer eyeshadow in the center of my lid, I took the slightly darker blue shade from the palette and applied that on my crease. For inner corners I took the white shimmer shade and applied that. I also used a light brown shade from the palette to give my crease some more definition.

Using my urban decay black eye pencil I lined my waterline. With the black eyeshadow I smudged the pencil and shaded under my waterline. I then applied my liquid eyeliner from NYC and created a wing.

For brows: I filled in my brows with a Loreal Paris brown shadow, and under my brow bone I applied a little bit of the white shimmer shade.

You can finish the look by applying falsies!

Thank you so much for reading!

Hopefully I am going to post more looks! Stay tuned 😍

Xoxo
Naz

Tuesday, January 13, 2015

December 2014 Favorites: makeup, skincare, and accessories

Hey dolls, I know this is a bit late but I wanted to share my December Favorites with you!

I don't have many products but whatever I purchased in December I wanted to share with you guys, so if you guys love it you can buy it too.
I know I posted about the Sally glitter and Glue last time but I purchased another one this December.

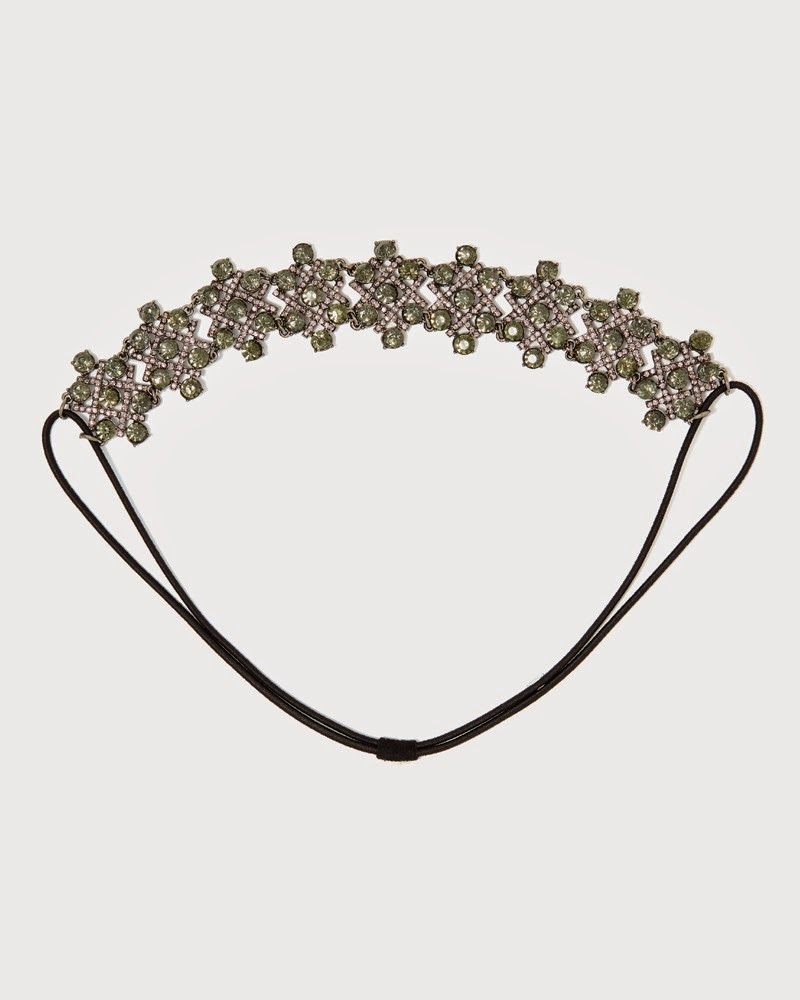
I purchased this headpiece from Charming Charlie, it is so gorgeous with gray crystals that sparkle!
You can either purchase it at the store or order it on their website. I love it so much, cannot wait to wear it at an event!

I needed a setting powder that is not loose, because I already own a loose powder (it is running out) so I wanted to purchase a matte powder that will last me longer because loose powders don't last for me. I love the M.A.C mineralize natural setting powders. My shade is Medium Honey.
I purchased the Smashbox Photo Op Palette because it caught my eyes when I was in Ulta. It is so pigmented and you can use it both wet and dry. I use it dry ususally but if you have M.A.C fix plus or any setting spray (I have MakeupForever setting spray) you can mix it on the brush and use it wet for a metallic finish!
The colors are beautiful. One thing I love about this pallete is that the colors range from gold, silver, purple, blue and brown with also some matte colors in it that will be perfect transition shades or even if you want a matte eye look, you can use those shades.
Sally Beauty is my favorite store since their glitters are so inexpensive and worth it! The quality is amazing, they are not a rip off unlike some brands that sell glitter for $10 a pop! Glitter is very cheap to make and not expensive! If you are purchasing glitter that is $10 then thats fine too, maybe it will be ultra fine pigments, but if you want small specs of glitter then go to sally for a perfect deal. they are $1.00 and the adhesive is also $1.00! Can you believe that! I purchase all my glitters from Sally Beauty. Just be careful with them, apply the glitter slowly wipe off any access that will fall under your eyes. Make sure to apply the adhesive on your lids first and use a small brush to apply the glitter. Make sure not to put it inside your eyes (DUHH lol). The glitter sparkles and looks gorgeous in pictures! 
Lastly, I purchased a skincare item that works on my skin. I have some acne scars and these anti blemish pads from Noxema work well since my skin was break out recently. I have been using it since the beginning of December and I noticed that my marks are slowly vanishing. It does have strong scent and some acne medication inside so it will give you a tingle sensation on your face but it really works if you are dealing with blemishes and acne marks. 
You can purchase it at any drugstore! 

Thanks for reading, stay tuned for more :)
Love, Naz


Thursday, January 8, 2015

Anastasia Beverly Hills Contour Kit Review


Hey my dollies, I wanted to do a quick review on the popular Anastasia Beverly Hills Contour Kit! The pictures I posted you can see how pigmented the colors are! I customized my palette so I have different shades in my kit. I have Banana, Vanilla, and Champaigne for highlight and for Contour shades I have Earth, Havana and Expresso.

I will tell you why I choose those specific colors. I chose those colors because they were in between. The original contour kit has colors that looked a little muddy and taupe for my complexion so I left Havana in there, but I chose Earth, and Expresso.

Expresso has a chocolate coffee color. It is very pigmented. Expresso is perfect contour color for all skin tones. It is dark and if you contour with it, it will seem like you have a harsh contour going on, but make sure to blend and it will look flawless, especially during weddings and evening events, or when you are going out at night. It will look gorgeous.

Havana, that is in the original contour kit is perfect for skin tones from fair to medium. It is a tan brown that has no other color mixed with it.

Earth which has the red brown color, is my favorite since it will look beautiful on every skin tone from fair to dark. I have a medium skin tone with yellow undertone and if you add Earth on that type of skin tone, your contour will look so gorgeous since the brown red color will pop.

The colors for highlight are also pigmented, and I think the shade Banana is so pretty and it will make your skin look flawless. It is perfect for all skin tones!
Vanilla is a shade that is very light, and it has a pale powder color to it, it will look pretty on fair-medium skin tones and if you have blemishes to cover it is the perfect color!

The shimmering highlight shade I chose is Champaigne, I don't remember if that was in the original kit already or if I chose it to customize (lol) but it is a light gold shade that will look super gorgeous on all skin tones! I personally do not like pink highlight shades, I love gold, I am all about that golden glow! ;)

The pictures I posted on right, I used the Contour kit. I first used MAC mineralized skinfinish foundation, then I contoured my face using Earth and Havana mixed together.

I added banana under the eyes and around the corners of my nose and forehead too.
I added Champaign as a highlight above the on brow bone and cheekbone.

For my eyes: Maybelline Cream shadow in brown, and inglot gel liner no.77 using real techniques liner tip silicone brush since I have allergies to the brush hairs going into my eyes. :/

No lip stick since I wasn't finished and my hubby took a picture before I put lipstick on lol.

I hope you guys like my review and stay tuned for more, I will post more looks soon! :)

To order the contour kit customized palette, you can go on the website or if you want the original kit just go to Ulta or Sephora!
Love,
Naz <3


Thursday, January 1, 2015

2014 Victorias Secret Fashion Show Inspired Makeup!

Hey guys, Happy New Year!!! 2014 was a roller coaster for me and SO much has happened and I cannot thank Allah enough, I cannot wait to see what 2015 has in store!!! (iA) Hope you all had a great New Year, and are looking forward to live life with love, happiness and less worries this year!! Anyways I wanted to post up a makeup look that I really love, and its from the Victoria Secret Fashion Show. All the models were looking gorgeous with natural glowing makeup and their wavy hair down, so I wanted to re create that look. I hope you enjoy!

What you will need! 
1. Studio Sculpt Foundation (MAC) 
2. Loose powder (MAC) 
3. Bronzer (Lorac)
4. Concealer (Revlon Photo Ready)
5. ABH Contour Kit
6. Rose Gold pigment (MAKEUP GEEK) 
7. Matte Bronzer (Rimmel Matte)
8. Gold, Rose Gold, Brown eye shadows
9. Black gel Eye liner (Inglot 77)
10. Mascara (MUFE)
11. Peachy nude lipstick (I have mine from MUFE) 
12. Clear Lip Gloss 


So first I moisturized my face using Cetaphil lotion, since this look is going to be natural and very glowing, I wanted to be looking fresh and moisturized. 
I applied my studio sculpt foundation in NC 42, it is a shade dark but after I add the powder it will blend it, plus the V.S Models look bronzed up so I used 1 shade darker than my skin tone so I can look glowing and bronze. 
I then applied the Revlon Photo Ready concealer under my eyes and where ever I had blemishes. 
I took my loose powder and applied that all over my face. 
Then I contoured my face and nose with the ABH kit. (My jawline and below my chin, then I blended that all)
I took Banana in the ABH kit and added that shade under my eyes, and also bridge of my nose. 
After that, I took a Rose gold pigment and applied that on the highlight area on my cheeks, and then took Lorac bronzer (it has shimmer) and applied that on top so I mixed both of those colors together to get a sparkle glow effect.
After that I started on my eyes, I primed them with urban decay primer potion, then took a gold shade and applied that all over my lids, I then added brown on the crease, not a cut crease just a regular smudgy crease, I then took rose gold and added that in the inner corners of my eye and also on the lid, so I mixed gold and rose gold together.
I then applied black gel liner on lash line and smudged it with a smudge brush, then took brown eye shadow and applied that on the black liner, so I smudged that all on the lash line, so it will create this smokey, brown effect. 
Then, I applied my mascara 2 coats on top and bottom lashes. 
I went over my face again with Rimmel Matte Bronzer so my face have that healthy bronze and to finish off the whole look.
Finally, I took my nude lip stick and applied that on my lips and added clear lip gloss! 

I really enjoyed re creating this look, and I really love this makeup its so dewy and I love the glowing makeup looks. Its my new obsession! 

Thank you for reading and tune in for more later, 
Love 
Naz

P.s- All products can be bought at Ulta Beauty, Sephora, Makeupgeekcosmetics.com, Amazon.com

One Love <3